
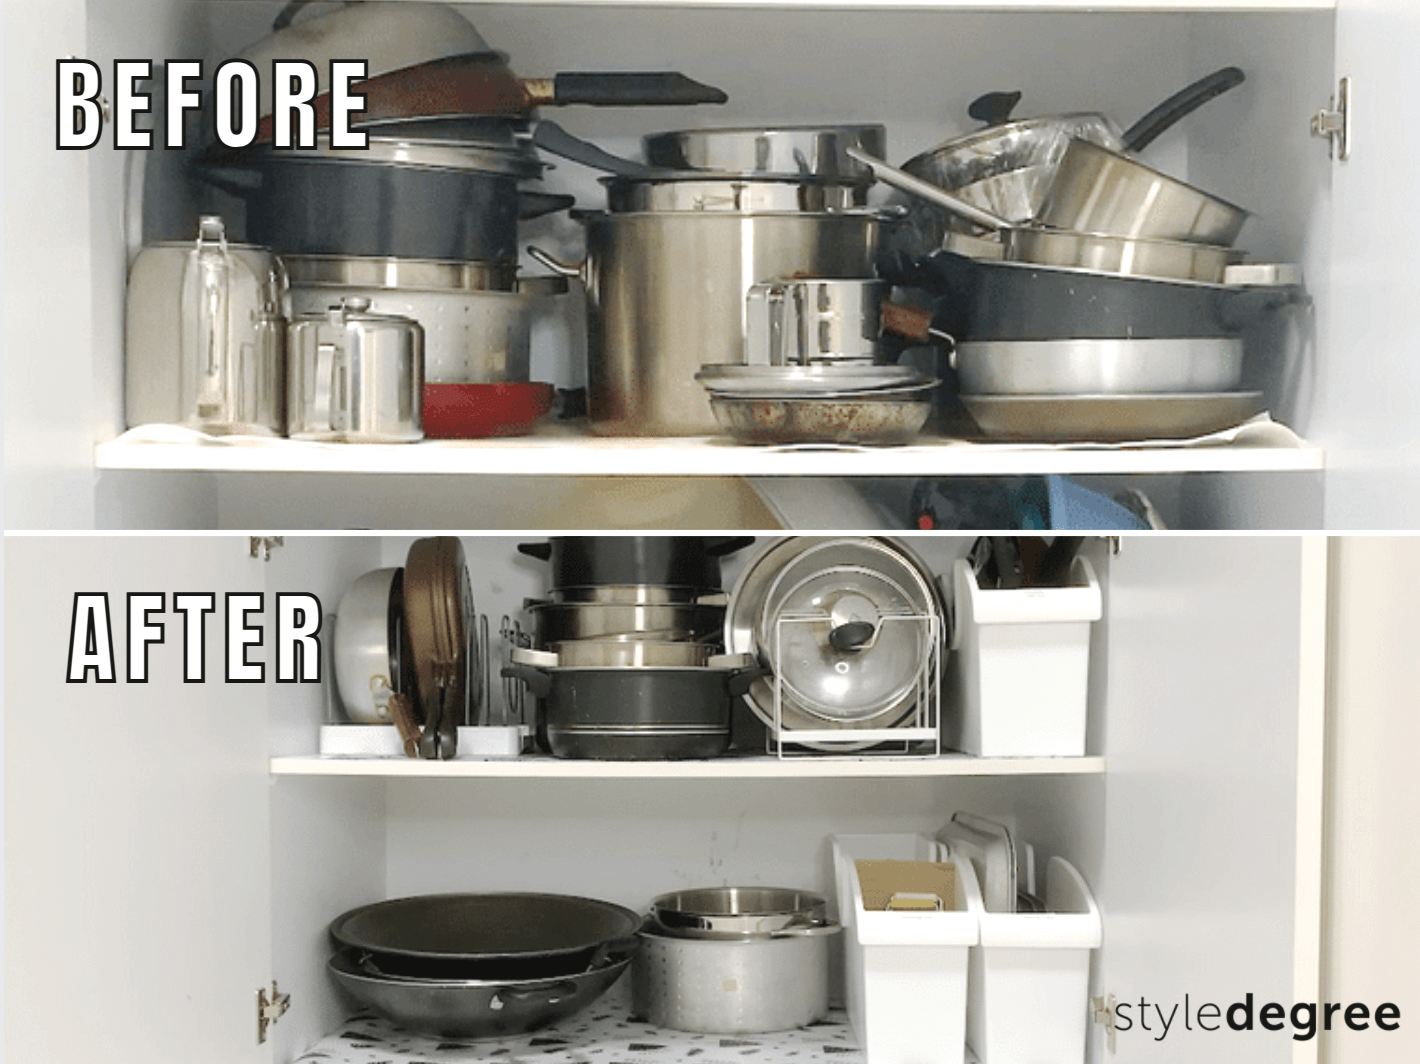
Organize pots and pans by size, frequency, and easy-access zones for cleaner, safer cabinets.
I have helped dozens of kitchens become calmer places by solving the same problem: how to organize kitchen cabinets pots and pans so cooking is faster and cleanup is easier. With years of hands-on experience reorganizing homes and testing storage solutions, I will walk you through a practical, step-by-step plan. You will learn simple measurements, smart hardware, and low-cost hacks that make everyday pots and pans easy to find and safe to store. Read on to get clear, expert-backed steps that you can apply today.

Start with a plan: assess, declutter, and measure
Begin by emptying the cabinets that hold pots and pans. Lay everything on a counter so you can see what you own. Sort items into four piles: keep, donate, storage-only, and discard.
Take these measurements:
- Cabinet width, depth, and height.
- Shelf heights if adjustable.
- Door swing and any obstructions like garbage disposals or plumbing.
Decide your goals before you buy organizers. Goals can include:
- Easy daily access for the most-used pots and pans.
- Protecting nonstick surfaces.
- Saving space for larger stockpots and rarely used items.
How this helps: knowing dimensions and goals prevents impulse buys that do not fit. This first step sets the groundwork for every decision on how to organize kitchen cabinets pots and pans.
Zone your kitchen for pots and pans
Zoning means placing items where you use them. Keep this rule simple: store pots and pans near the stove and prep areas.
Suggested zones:
- Everyday cooking zone: pans, small saucepans, lids.
- Baking and roasting zone: roasting pans, sheet pans, Dutch ovens.
- Specialty zone: canners, large stockpots, wok.
- Overflow or seasonal zone: holiday cookware, seldom-used sets.
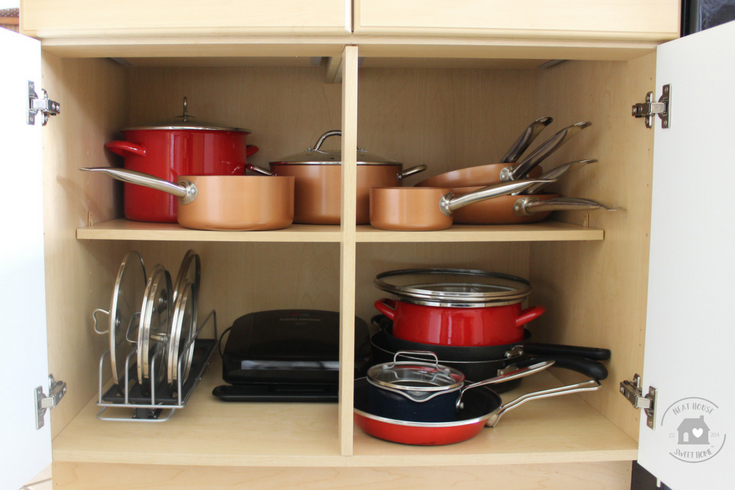
Place heavy items on lower shelves and lighter or fragile items higher. This keeps cabinets safe and user-friendly. Zoning directly addresses how to organize kitchen cabinets pots and pans by function, not by emotion.

Choose the right hardware and organizers
Good hardware changes everything. Match organizers to your measurements and cooking habits.
Options to consider:
- Pull-out shelves: slide-out trays make deep cabinets usable.
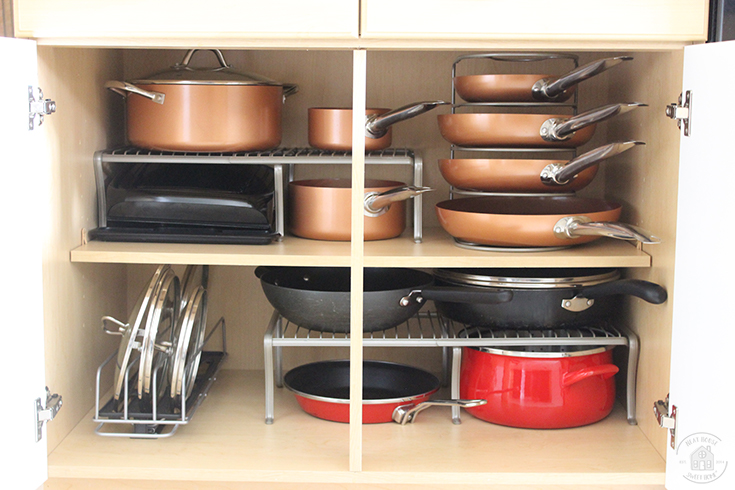
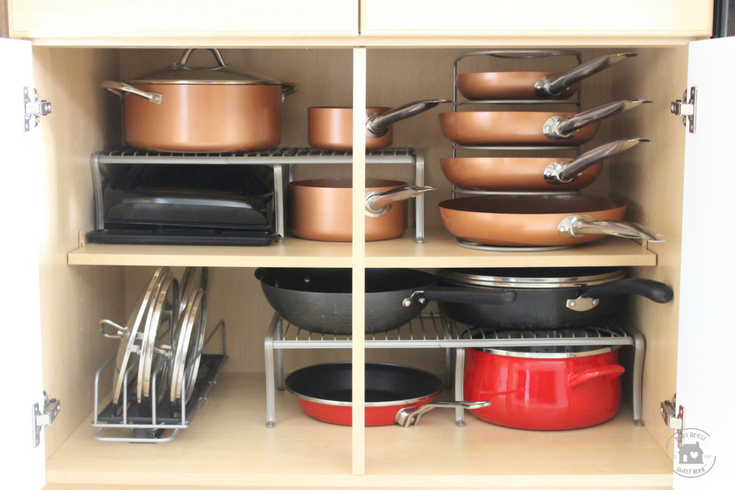
- Vertical pan racks: store skillets vertically for easy access.
- Tiered shelf risers: double shelf height for lids and small pans.
- Pegboard inserts: place wooden or rubber-tipped pegs to hold pot bottoms.
- Lid organizers: separate racks or vertical holders to pair lids with pots.
- Over-the-door racks: use for lightweight lids or lids with handles.
Select durable materials. Look for metal or hardwood with proper finish. These choices determine how well your system lasts and how easy it is to maintain. Pair hardware with your style and cabinet layout to optimize how to organize kitchen cabinets pots and pans.
Smart layout techniques for stacks and protection
Stacking is space-saving but can damage pans if done poorly. Use these tactics to protect surfaces and make reach simple.
Stacking tips:
- Nest pans from largest to smallest, but place a soft liner or pan protector between each.
- Keep nonstick cookware separate or use pan protectors to prevent scratching.
- Store heavy, flat-bottomed pots on the bottom of stacks to avoid crushing.
- Reserve a shallow drawer or front rack for fragile or frequently used pans.
Protection ideas:
- Felt or silicone pan guards.
- Shelf liners on pull-out trays.
- Small foam clips for pan handles so they don’t rub together.
These methods maximize space while preserving cookware. They also make clear the practical answer to how to organize kitchen cabinets pots and pans for everyday use.
Lid management: pair, stack, and store
Lids are often the main clutter. A lid strategy saves time and space.
Lid systems:
- Store lids vertically in a rack or stand to pair quickly with pots.
- Use a shallow bin or tray to stack lids by size in deeper cabinets.
- Attach an internal door rack to hold lids upright and visible.
Label lids if you have many similar sizes. Pairing lids with pots keeps your cabinets organized and reduces time spent searching. This step is essential when organizing how to organize kitchen cabinets pots and pans efficiently.
Use vertical and wall space
Walls, the inside of cabinet doors, and under-cabinet areas are unused real estate.
Ideas to use vertical space:
- Hang a rail with hooks for frequently used pans.
- Install a pegboard on a pantry or inside a deep cabinet.
- Add vertical dividers to hold baking sheets and thin pans upright.
Keep hanging pans within reach to avoid heavy lifting. Vertical solutions are power tools for the problem of how to organize kitchen cabinets pots and pans without removing cabinet doors or adding costly renovations.

Budget-friendly DIY hacks
You don’t need a big budget to improve cabinet function. Try low-cost DIY tricks that work well.
DIY hacks:
- Use tension rods to create separators inside wide cabinets.
- Repurpose magazine holders as vertical dividers for lids or skillets.
- Add felt pads or adhesive shelf liners to protect finishes.
- Build simple pull-out trays from plywood and basic runners.
I used repurposed magazine holders in my first kitchen to store skillets vertically. It cost less than ten dollars and made a big difference. Small changes like these are practical answers to how to organize kitchen cabinets pots and pans when funds are tight.

Maintenance and routine to keep cabinets tidy
An organized system fails without upkeep. Set a short routine to keep pots and pans under control.
Maintenance steps:
- Do a quick 5-minute cabinet tidy weekly.
- Return items to their zone immediately after washing.
- Reassess every six months for wear and changing needs.
Labeling zones or shelves helps guests and family members return items correctly. Regular care ensures your setup continues to answer how to organize kitchen cabinets pots and pans as needs evolve.

Common mistakes to avoid
Avoid these frequent errors when planning your layout.
Common mistakes:
- Buying organizers before measuring the cabinet space.
- Stacking without protection and scraping nonstick surfaces.
- Placing heavy pots on high shelves where they can fall.
- Ignoring lids so they remain mismatched and messy.
Learning from mistakes speeds progress. I once installed fixed shelves that were too close together and had to rip them out. Measure first, then buy. This simple rule is central to how to organize kitchen cabinets pots and pans successfully.
Frequently Asked Questions of how to organize kitchen cabinets pots and pans
How should I arrange pots and pans for daily use?
Place the most-used pots and pans near the stove in a lower cabinet. Keep lids and utensils within the same zone for quick access.
Are pull-out shelves worth the cost?
Yes. Pull-out shelves transform deep cabinets into usable space and reduce heavy lifting. They are a good investment if you cook often.
How do I protect nonstick cookware when storing?
Use pan protectors, felt liners, or soft cloth between pans. Avoid nesting without protection to prevent scratches.
What is the best way to store large stockpots?
Store large stockpots on lower shelves or a dedicated pantry space. Slide-out trays or the floor of a cupboard make them easy to lift and use.
Can I store pans vertically in a cabinet?
Yes. Vertical dividers or a pan rack will keep pans visible and accessible. Make sure the dividers are sturdy and sized for your cookware.
How often should I declutter pots and pans?
Declutter at least once a year or when you change cooking habits. Donate or recycle items that you no longer use.
Conclusion
You can make your kitchen calmer by organizing pots and pans with clear zones, the right hardware, and regular upkeep. Start by measuring and decluttering. Then choose organizers that match your habits and cabinet layout. Small habits, like returning items to their zone and protecting nonstick surfaces, keep cabinets functional for years. Take one cabinet this weekend and apply a single change. If you enjoyed these tips, try one hack now, subscribe for more kitchen guides, or leave a comment about your favorite storage trick.