
Build custom kitchen cabinets by measuring, planning, cutting, assembling, finishing, and installing with care.
I have built and overseen dozens of cabinet projects, and I will guide you through how to build custom kitchen cabinets with clear, practical steps. This article packs design advice, material choices, step-by-step construction, finishing options, and installation best practices. You will learn the skills and trade tips I use on real jobs, common mistakes to avoid, and how to plan your time and budget. Read on to gain confidence and a firm plan for building durable, beautiful custom cabinets that fit your kitchen perfectly.
Planning and design fundamentals
Good cabinets start with solid planning. When you learn how to build custom kitchen cabinets, you must measure carefully and create a layout that matches traffic, appliances, and workflow. Begin by drawing a simple floor plan with cabinet footprints, appliance locations, and clearances.
Key planning steps
- Measure twice, write once. Record wall lengths, ceiling height, window and door positions, and appliance specs.
- Determine cabinet styles and door clearances. Allow 36 inches for main work aisles when possible.
- Sketch elevations for each wall. Show upper and lower cabinet heights and any filler pieces.
- Decide on standard box sizes or custom widths. Standard sizes simplify construction and reduce waste.
Personal tip: on my first full kitchen build, I rechecked the refrigerator depth after ordering doors. That saved me from costly rework later. Proper planning reduces surprises and makes the build faster.

Materials and tools: select what fits your goals
Choosing materials shapes cost and durability. Knowing how to build custom kitchen cabinets means selecting the right plywood, hardware, adhesives, and finishes for the project.
Common material choices
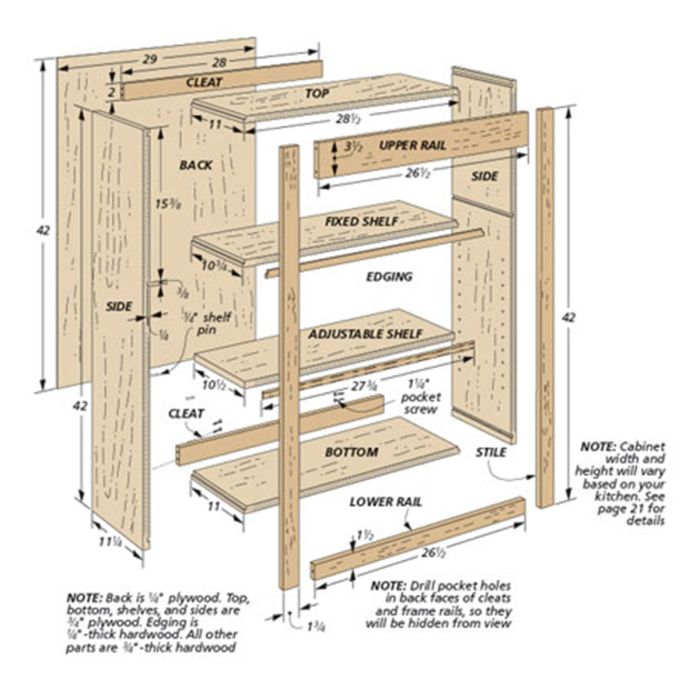
- Box material: 3/4 inch cabinet-grade plywood for box sides and shelving. Use 1/2 inch plywood for backs if framed.
- Face frames: 1×2 or 1×3 hardwoods for framed cabinets, or use a full-overlay design for frameless.
- Doors and drawer fronts: solid wood, MDF with veneer, or plywood with a hardwood veneer.
- Hardware: soft-close hinges, quality drawer slides, and cabinet pulls/knobs rated for kitchen use.
Essential tools
- Tape measure, speed square, and marking tools.
- Table saw and miter saw for accurate cuts.
- Router with edge bits for rabbets and profiles.
- Drill and pocket-hole jig or biscuit joiner for strong joinery.
- Clamps, sanders, and finish brushes or sprayers.
Experience note: I favor cabinet-grade plywood for stability and edge-banding rather than solid plywood edges. It reduces warping and gives a clean final look.
Measuring, layout, and cut list
Accurate measurement and a clear cut list save time and material. Learning how to build custom kitchen cabinets hinges on careful prepping before cutting.
Steps to prepare
- Finalize cabinet widths, heights, and depths on paper.
- Create a cut list for sides, tops, bottoms, shelves, backs, and face frames.
- Add 1/8 inch to widths for dadoes or finish clearances when needed.
- Plan grain direction for panels and doors to maintain visual consistency.
Cutting strategy
- Break large plywood sheets into manageable panels first.
- Use a zero-clearance insert and fine blade to reduce tear-out.
- Label every part with a pencil and orientation mark.
Practical tip: lay out all parts on the shop floor in the order you will assemble them. This visible checklist reduced my assembly errors by half during a multi-cabinet job.
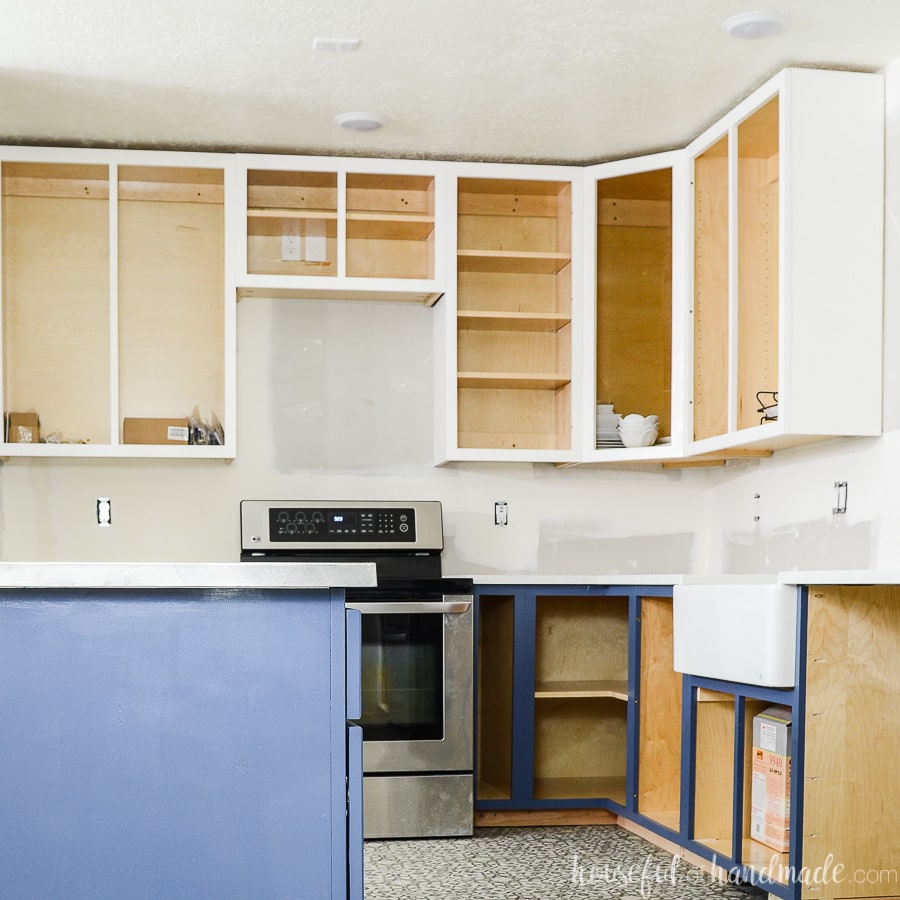
Building cabinet boxes: step-by-step
Cabinet boxes form the skeleton of your kitchen. Whether framed or frameless, the box must be square and sturdy.
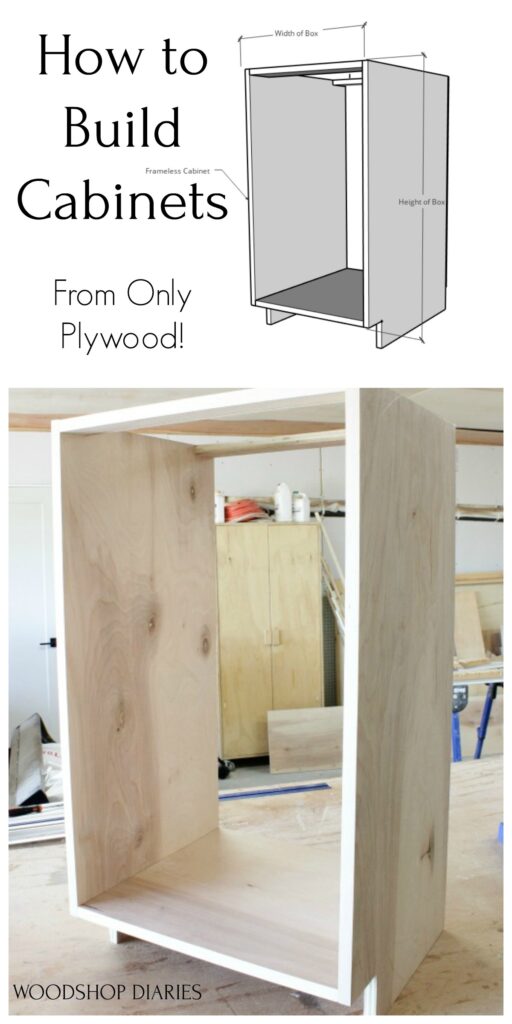
Basic box assembly (frameless example)
- Cut the top, bottom, and sides to size.
- Mark and cut dados for fixed shelves or for the back panel.
- Assemble with glue and pocket screws or confirm with solid joinery.
- Insert shelves and secure the back panel with glue and screws or with a rabbet.
- Check for square by measuring diagonals and clamp until dry.
For face-frame cabinets
- Attach face frames after box assembly using glue and clamps.
- Use biscuits or pocket screws for alignment.
- Ensure face frames are flush and square to prevent door alignment issues.
Quality checks
- Verify cabinet depth is consistent for countertop fit.
- Confirm openings are level and plumb for doors and drawers.
- Pre-drill hinge and slide holes while boxes are clamped to ensure alignment.
From experience, taking extra time to square boxes makes finishing and installation far easier. Small errors multiply during installation, so correct them early.

Doors, drawers, and hardware installation
Doors and drawers are the visible parts people touch daily. How you build and hang them affects function and perception.
- Use stable materials like MDF or hardwood veneer plywood for doors.
- Build rails and stiles with tight joints or use solid slab doors for modern looks.
- For drawers, use full-extension slides and 1/2 to 3/4 inch plywood or solid sides for durability.
Hardware selection and placement
- Position hinges consistently using jigs or templates.
- Set drawer slide locations carefully and test operation before final fastening.
- Use soft-close hardware where possible for a premium feel.
Adjustment tips
- Install doors slightly proud of the face frame then plane if needed for gap uniformity.
- Adjust hinge screws for vertical and horizontal alignment post-install.
- Check drawer clearance after installing pulls to avoid interference.
I once installed drawers without testing weight capacity and had to retrofit stronger slides. Test with realistic loads before finishing to avoid surprises.
Finishing and painting for long life
Finish protects cabinets and affects aesthetics. How to build custom kitchen cabinets includes selecting finishes that hold up to heat, grease, and moisture.
Finishing workflow
- Sand parts progressively from 120 to 220 grit for smooth surfaces.
- Apply seal coat or primer to raw wood or MDF to stabilize absorption.
- Use water-based lacquer, oil-based urethane, or conversion varnish depending on durability needs.
- Apply at least two top coats and sand lightly between coats.
Edge and hardware preparation
- Apply edge banding to plywood cuts for a clean look.
- Mask hinge and slide areas before spraying to avoid overspray on mechanical parts.
- Allow full cure time before installation to prevent dents and fingerprints.
Practical note: I prefer water-based finishes for low odor and quick drying. Test a finish on a sample board first to confirm color and sheen.

Installation and final adjustments
Installation brings your work to life. Proper sequence and attention to detail ensure a professional result.
Installation sequence
- Prepare the space by removing old cabinets and repairing wall studs.
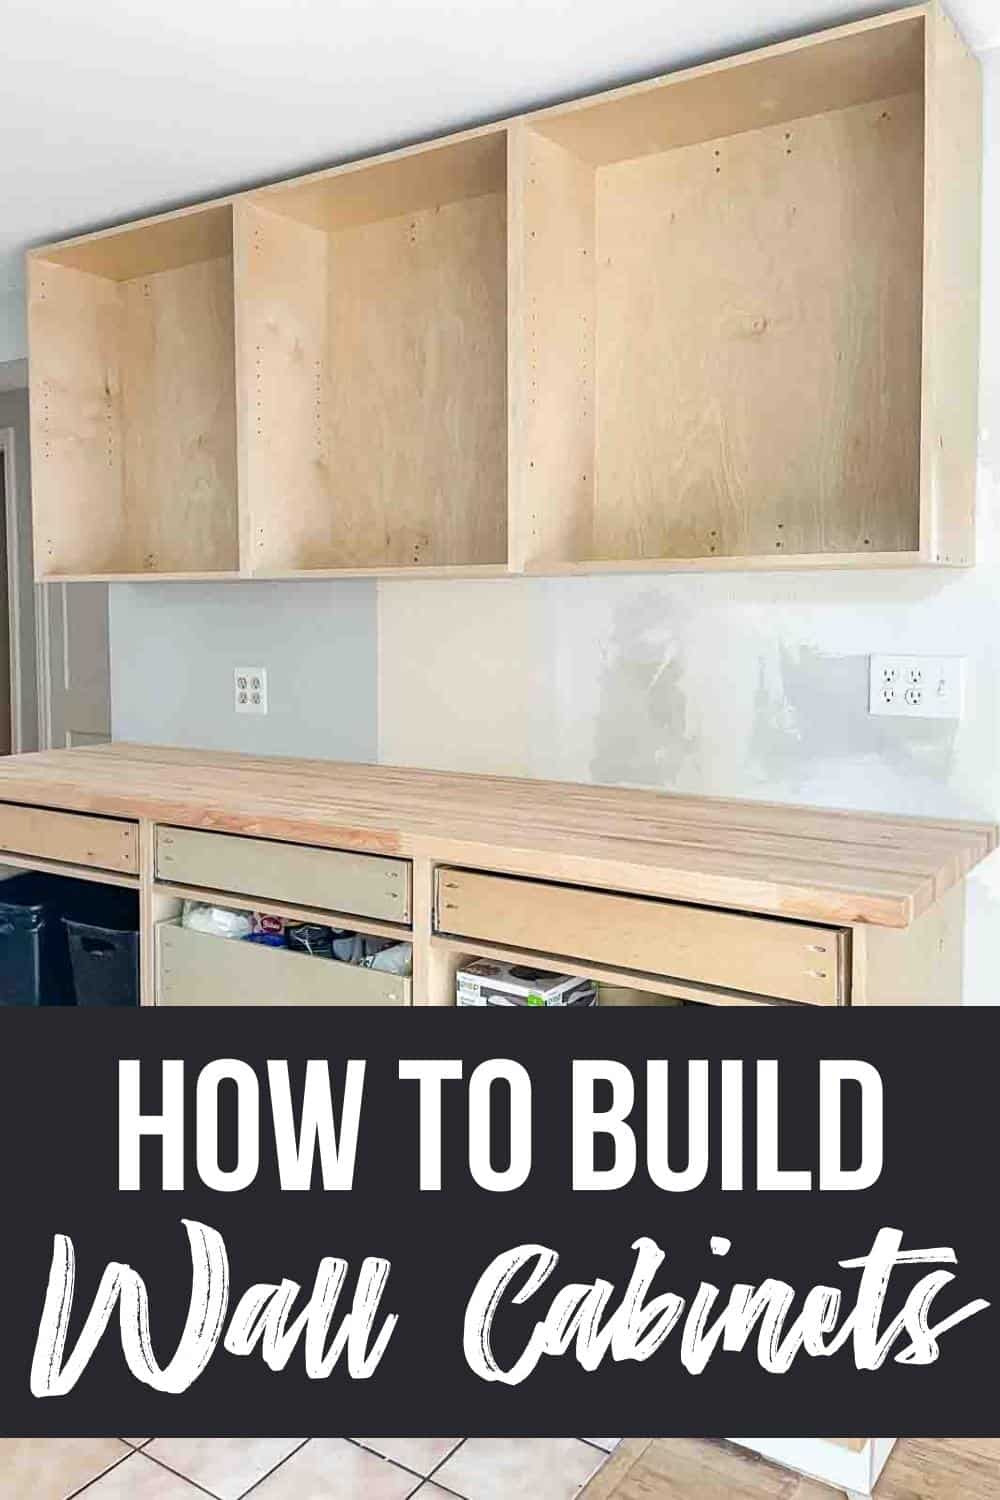
- Install upper cabinets first while supported by a ledger board.
- Level and shim each cabinet, then secure to wall studs.
- Install lower cabinets, ensuring they are level and aligned with uppers.
- Install countertops, backsplashes, doors, and hardware last.
Final checks
- Check for plumb, level, and consistent reveal around doors.
- Verify drawer operation and make hinge adjustments.
- Seal gaps between cabinets and walls with minimal caulk for a clean finish.
My routine: I always clamp cabinets together and screw through adjacent sides for a seamless seam. It tightens the run and improves strength.

Cost, time estimates, and project planning
Estimating cost and time helps you decide whether to DIY or hire pros. Understanding how to build custom kitchen cabinets involves realistic planning.
Typical cost factors
- Material quality—higher-grade plywood and hardwood raise cost.
- Hardware choices—soft-close and specialty slides add expense.
- Door style and finish—painted doors cost more than unfinished slab fronts.
Time estimates
- Small kitchen (8–12 boxes): 2–4 weeks for one experienced builder.
- Medium kitchen (12–20 boxes): 3–6 weeks including finishing.
- Larger or complex kitchens: plan for 6+ weeks.
Budget tip: Allow 10–20% contingency for wasted material or hardware changes. In one project, adding inset doors increased labor time significantly, which I had not first accounted for.

Troubleshooting and common mistakes
Avoid common pitfalls when you learn how to build custom kitchen cabinets. Small errors early can become costly later.
Common issues and fixes
- Warped plywood—replace or flatten with a stiff back panel and avoid installing in high-moisture conditions.
- Misaligned doors—check face frame squareness and adjust hinge settings rather than forcing doors.
- Uneven drawer operation—verify slide alignment and remove obstructions in the box.
- Incorrect measurements—re-measure openings on site before cutting final pieces.
Mistakes I’ve made and lessons learned
- I once glued face frames before checking box alignment. Lesson: dry-fit and clamp fully before final glue.
- I underestimated drying time for finishes. Lesson: schedule extra cure time to avoid fingerprints and dents.
These fixes are straightforward if caught early. Regularly step back and inspect work from different angles to spot issues before they compound.
Frequently Asked Questions of how to build custom kitchen cabinets
What basic skills do I need to build custom kitchen cabinets?
You should be comfortable measuring, cutting with a saw, drilling, and using clamps. Basic woodworking and finishing skills help you produce durable, attractive cabinets.
Can I build custom cabinets on a tight budget?
Yes. Use standard plywood sizes, simple door styles, and basic hardware to save money. Shop for deals on hardware and finish materials to reduce overall cost.
How long does it take to finish cabinets before installation?
Finishing typically requires several coats plus full cure time. Expect at least 48–72 hours for drying between coats and longer for full cure, depending on finish type.
Do I need special tools for professional results?
A table saw, router, drill, and clamps will cover most tasks. Optional tools like a pocket-hole jig, dowel jig, and spray system speed the work and improve consistency.
Should I hire a pro for complex kitchens?
Hire a pro for structural changes, gas or electrical work, and complex layouts. You can build the cabinets yourself but coordinate with trades for safe, code-compliant installations.
Conclusion
Building your own cabinets is a rewarding way to get a custom kitchen that fits your style and budget. Follow clear plans, choose stable materials, and work in measured steps to reduce mistakes. Start with accurate measurements, build square boxes, and finish with care to achieve a professional result. Take action: sketch your layout today, make a cut list, or try a single base cabinet as a practice piece. If you found this guide helpful, subscribe for more detailed woodworking guides or leave a comment with your project questions.